
Overview
This guide walks you through the process of connecting your Spotinga product feed to your Google Ads account to run “Things to do” travel campaigns.
1. Google Ads account data manager
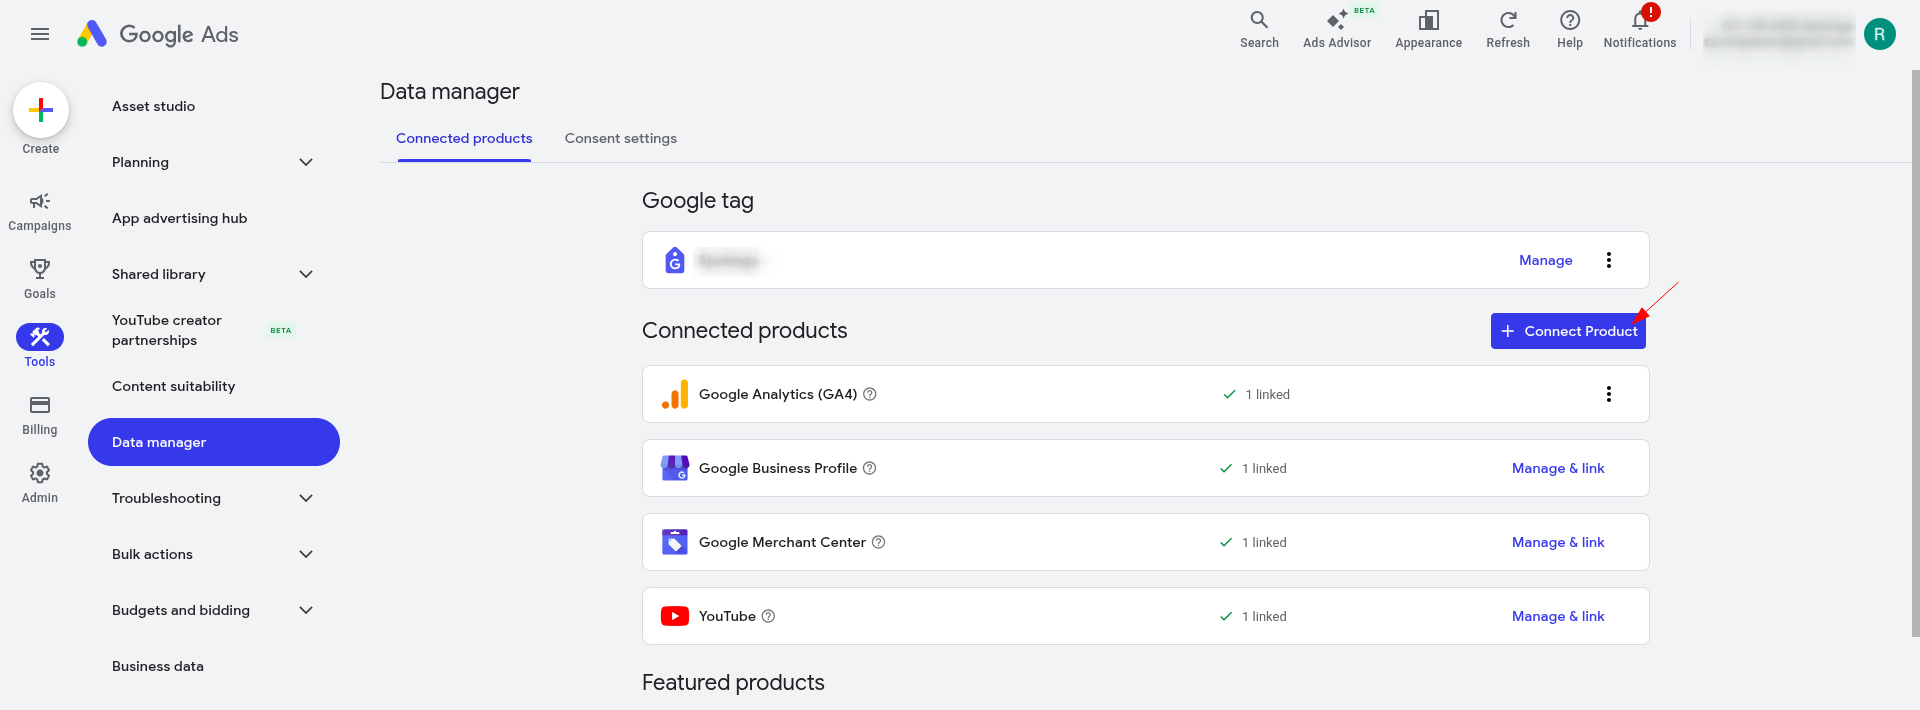
To begin the linking process, you must access the data management section of your Google Ads account:
- Log in to your Google Ads account.
- Click on the Tools icon (wrench) in the top navigation menu.
- Under the “Setup” column, select Data manager.
2. Manage and link to Things to do center
Once in the Data Manager, you need to find the specific connection for your experience products, which is part of the feed:
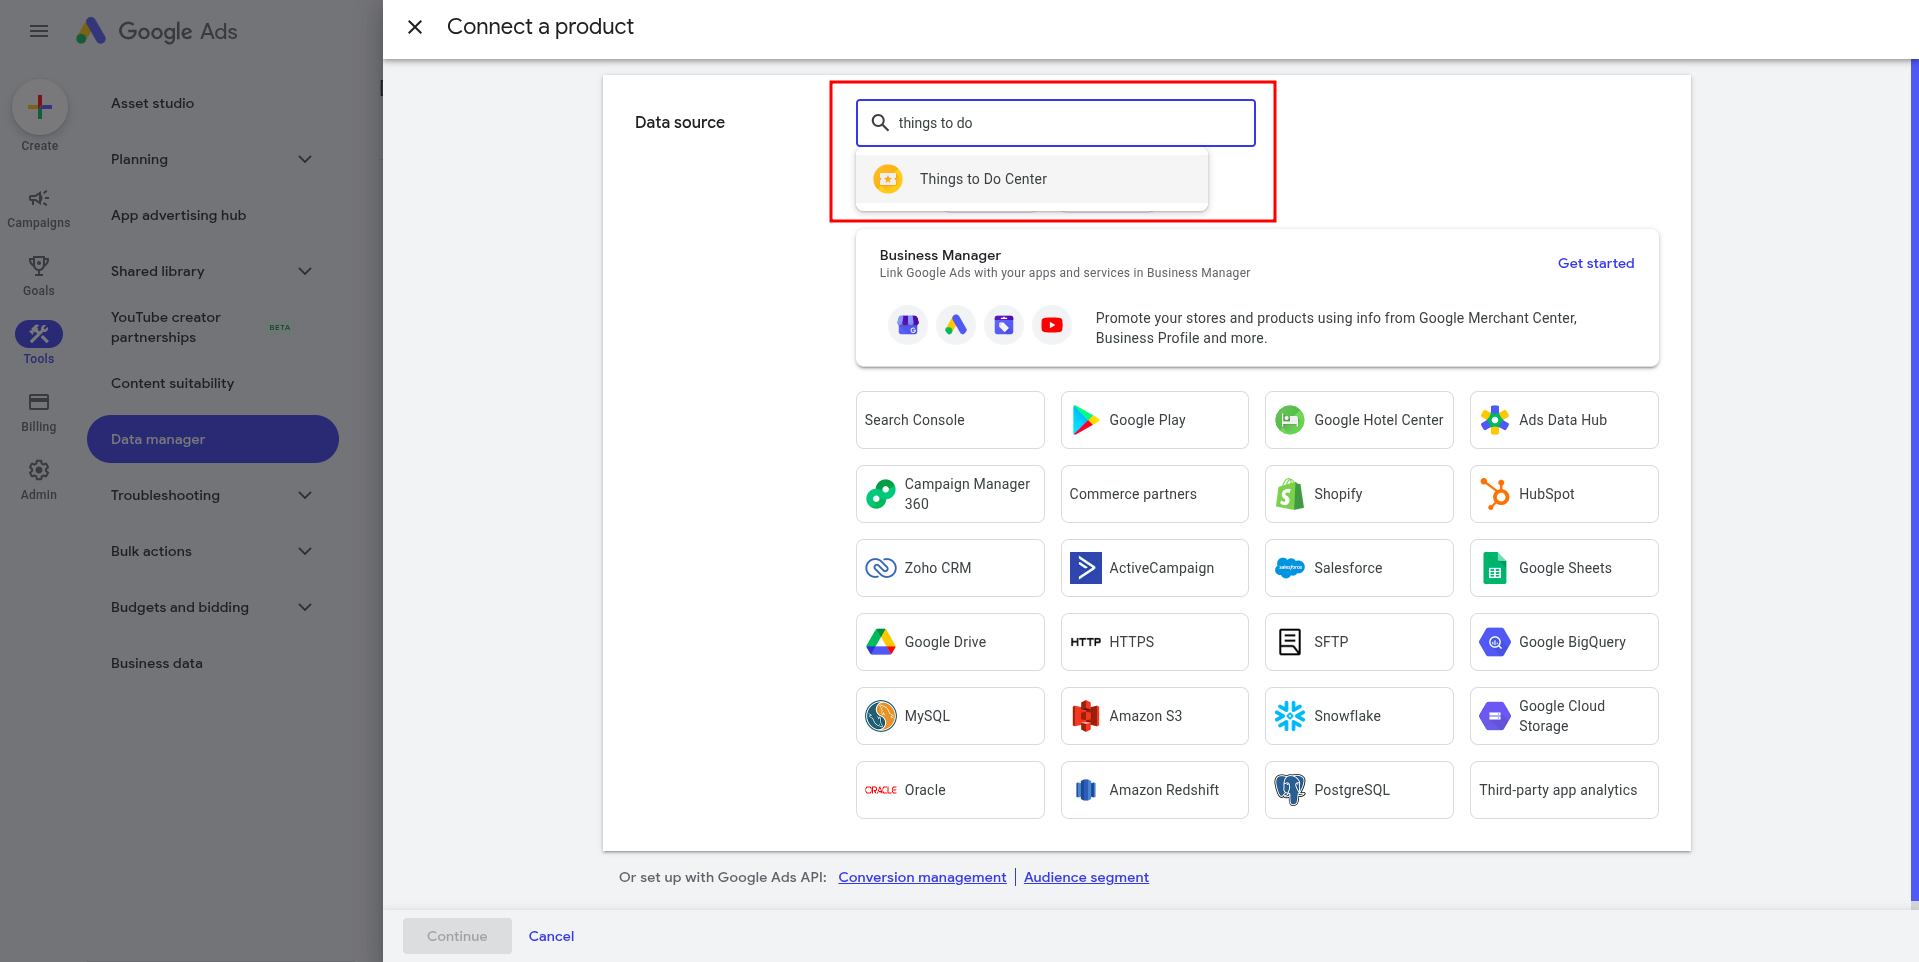
- Click the + Connect product button.
- In the search bar, type “Things to do centre” (Note: This may also appear as “Actions Center”).
- Click Connect when the product appears in the results.
3. Enter Feed ID
Google Ads requires your unique account identifier from the Actions Center to establish the handshake:
- Locate your Linking Account ID. You can find this in your Spotinga Host App > Organization > Settings > Integrations > Distributions Tab or by asking your account manager. Also make sure you enable the integration here.
- In the Google Ads “Enter link request details” screen, paste your Linking Account ID into the destination field.
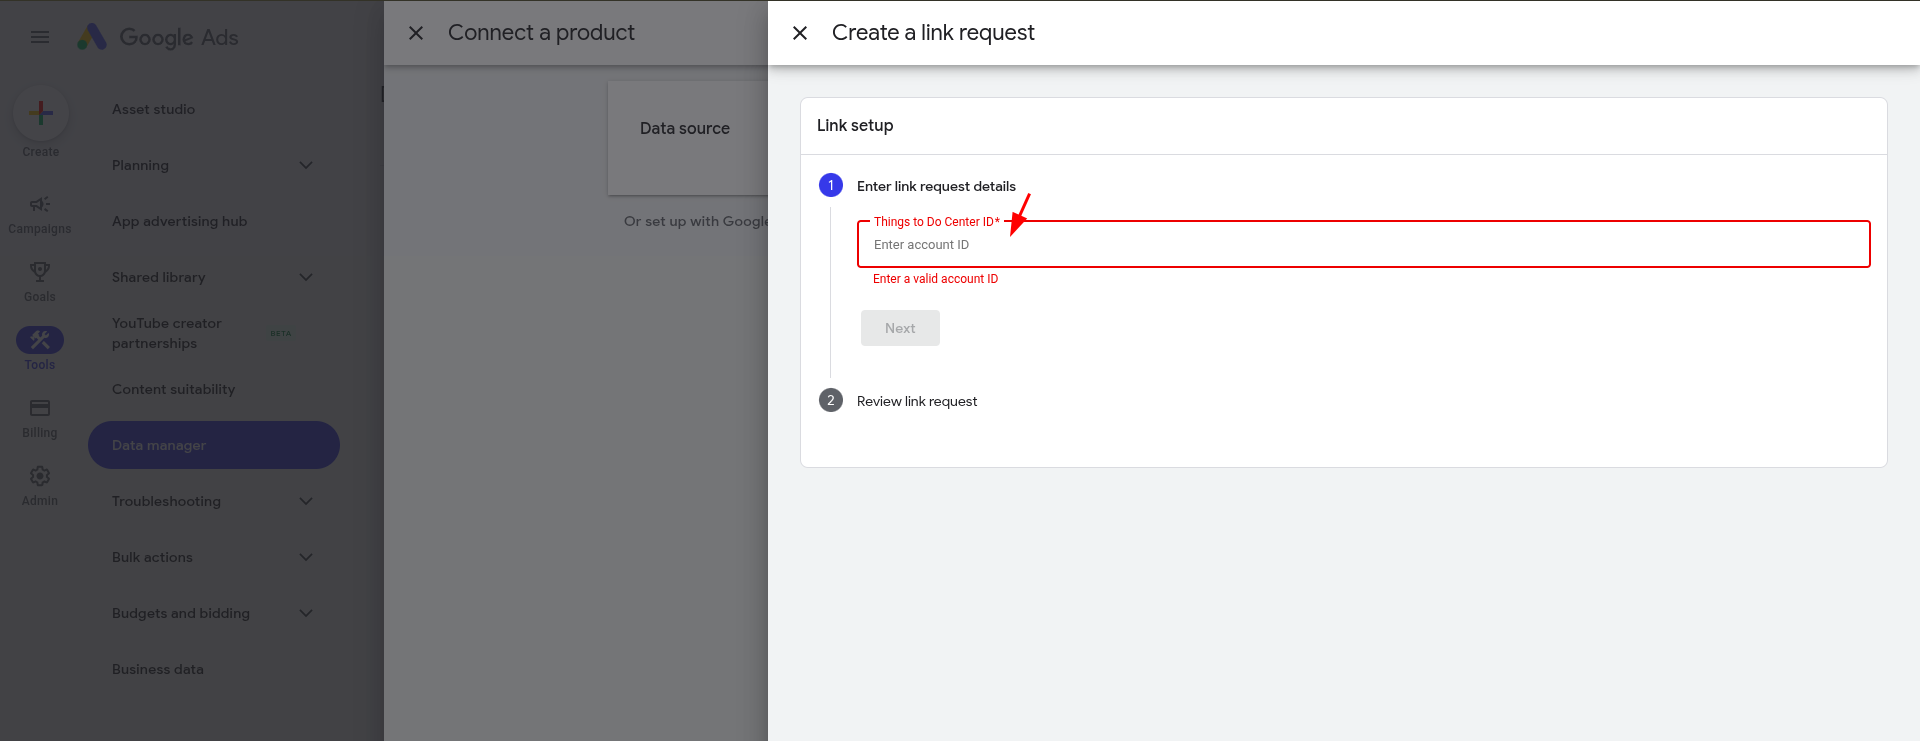
- Click Submit to send the link request.
4. Confirm with Spotinga
After the request is submitted in your Google Ads account, the connection must be authorized on the feed side:
- Notify the Spotinga Support Team or your dedicated account manager that you have initiated the link request.
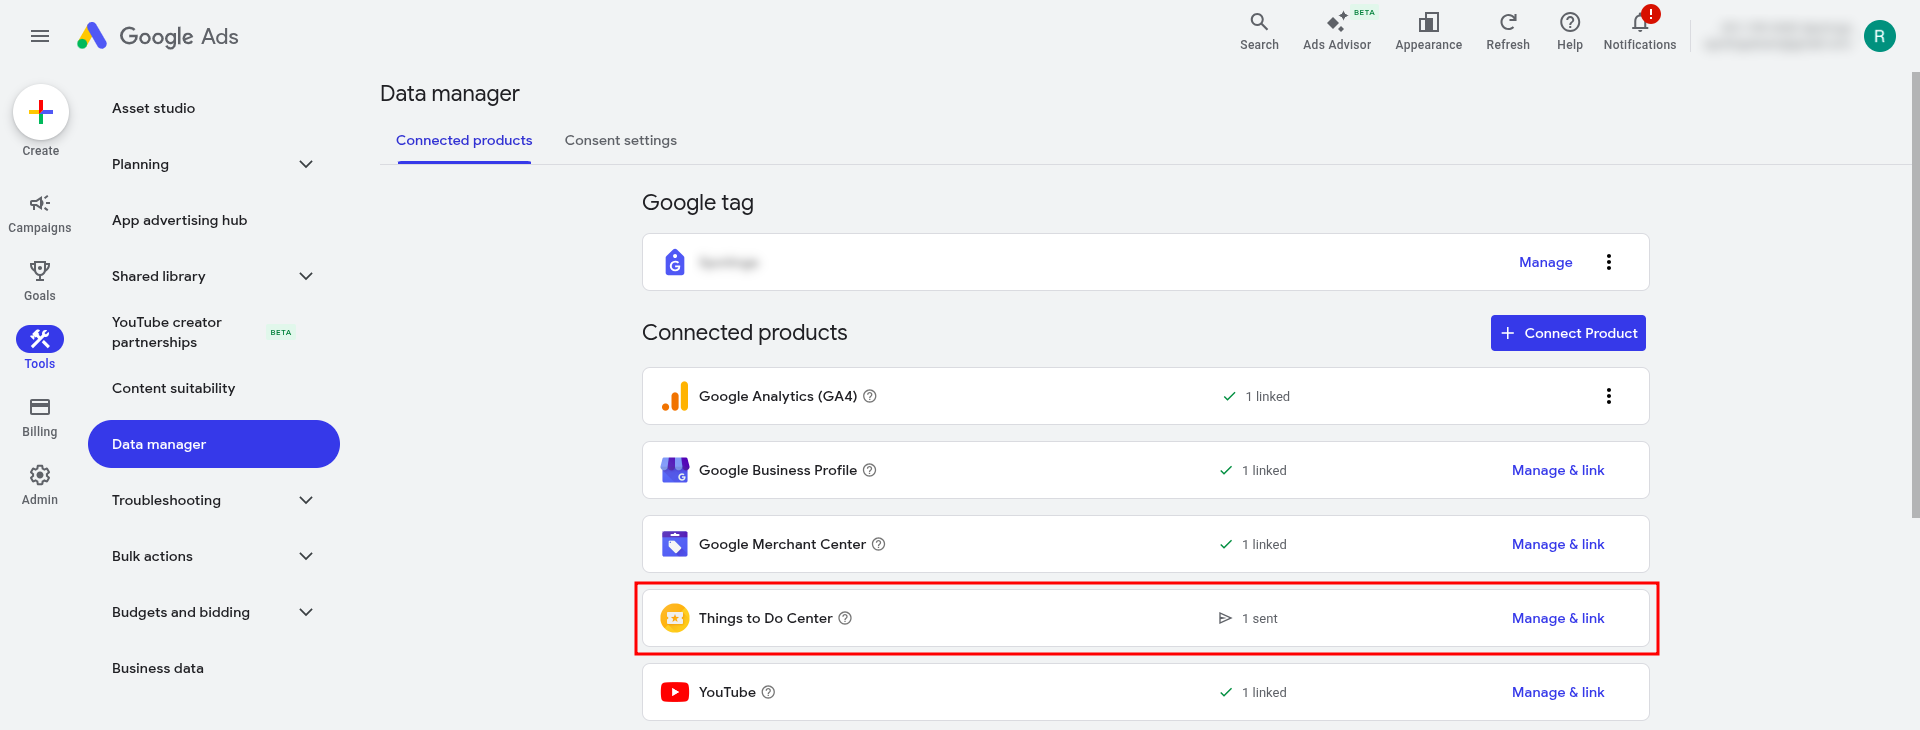
- Spotinga Team will review the request in the Actions Center and approve the connection.
- Once approved, the status in your Google Ads Data Manager will change to Linked.
5. Create a campaign
With the feed connected, you can now launch your first advertisement:
- In Google Ads, click the Plus button and select New Campaign.
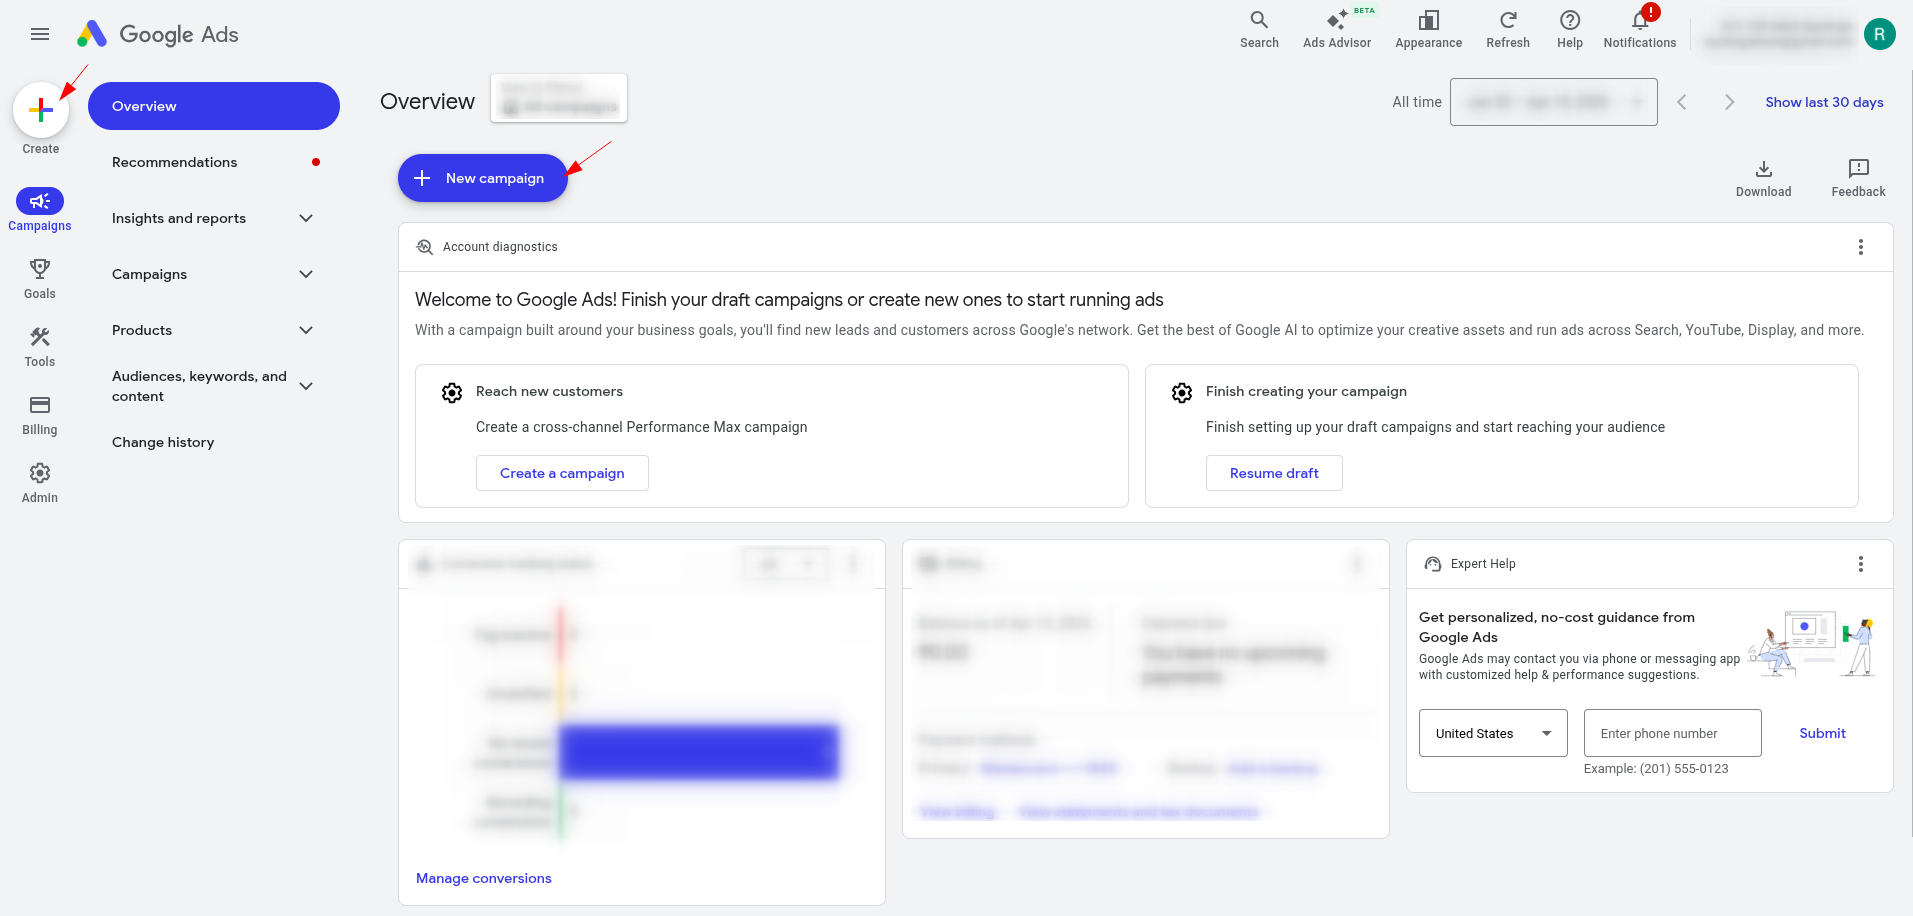
- Add Business Name and Website. Use direct product link from your Spotinga Product or your landing page per setup.
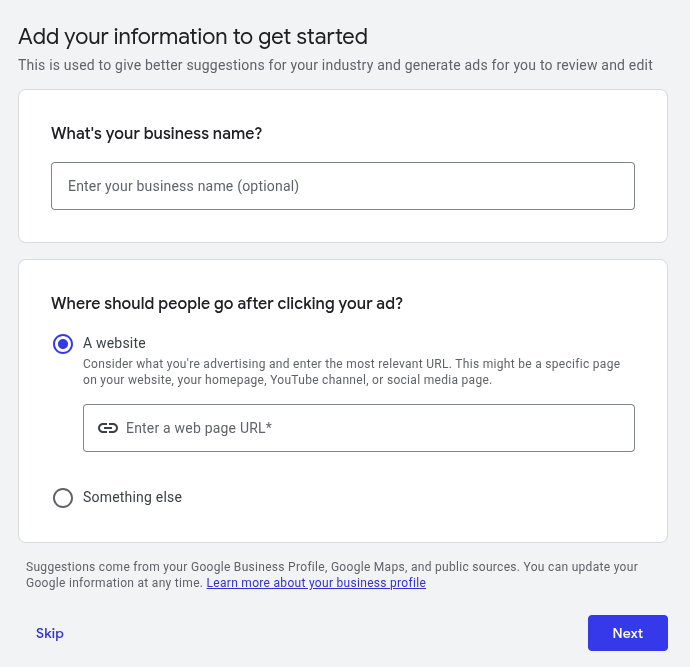
- Choose your objective (e.g., “Sales” or “Website Traffic” or “Create a campaign without guidance”).
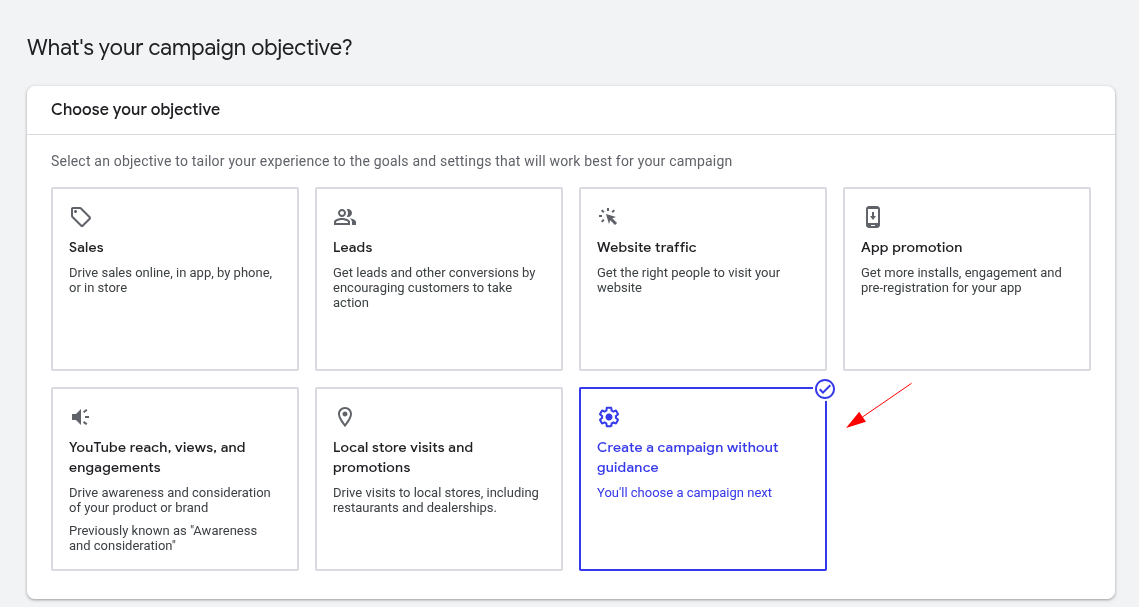
- Select Travel as the campaign type.
- Select Things to do as the travel result type.
- Ensure your newly linked feed is selected as the Activities data source.
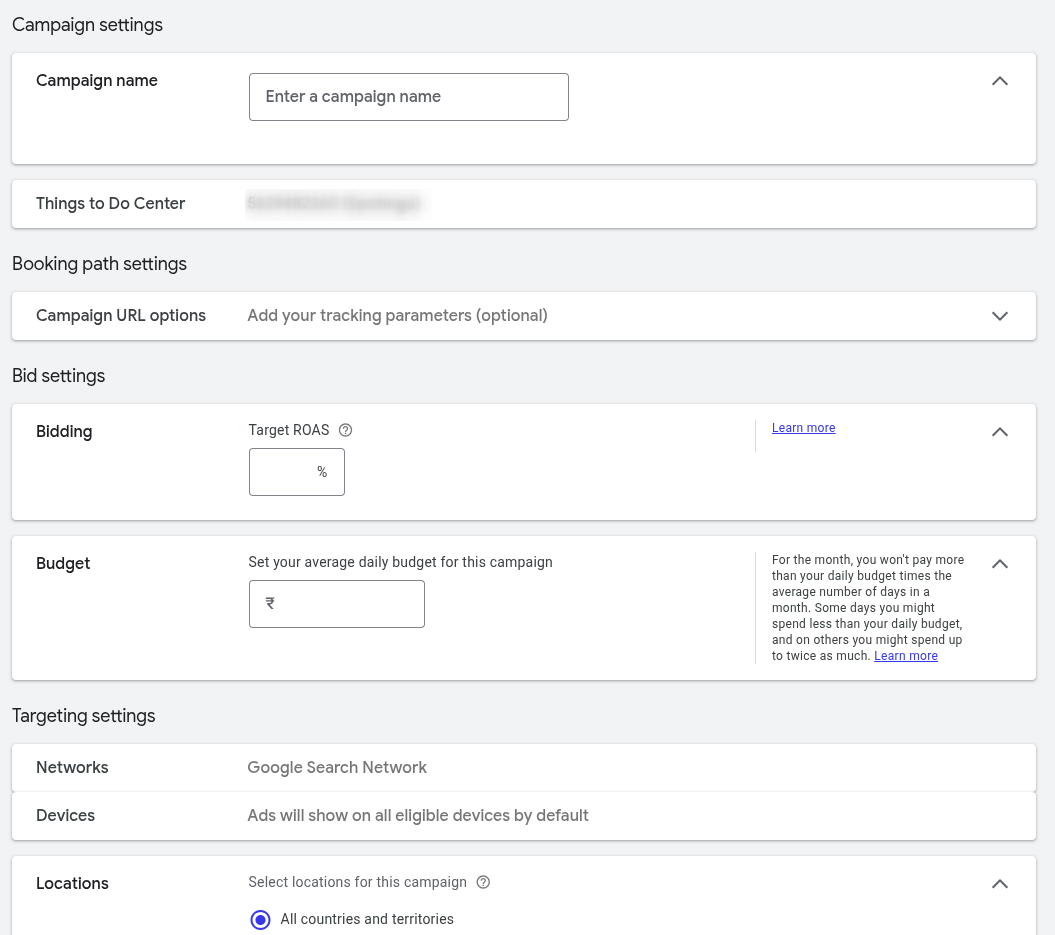
- Give your campaign a name, set tracking parameters, target ROAS. Set your budget and Maximize Conversion Value bidding strategy (standard for GTTD ads). Also set locations, start & end dates and review all the input fields.
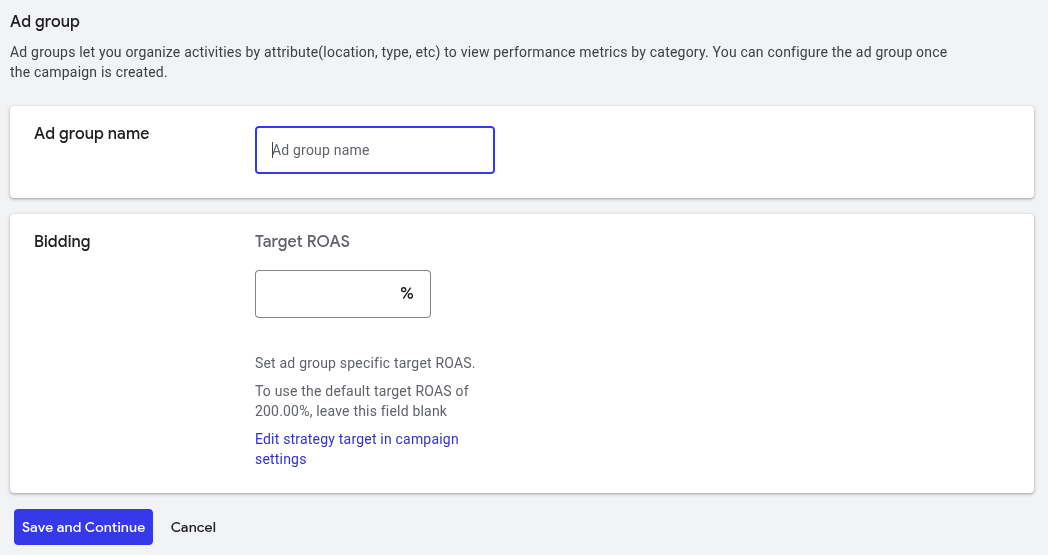
- Give your Ad Group a name.
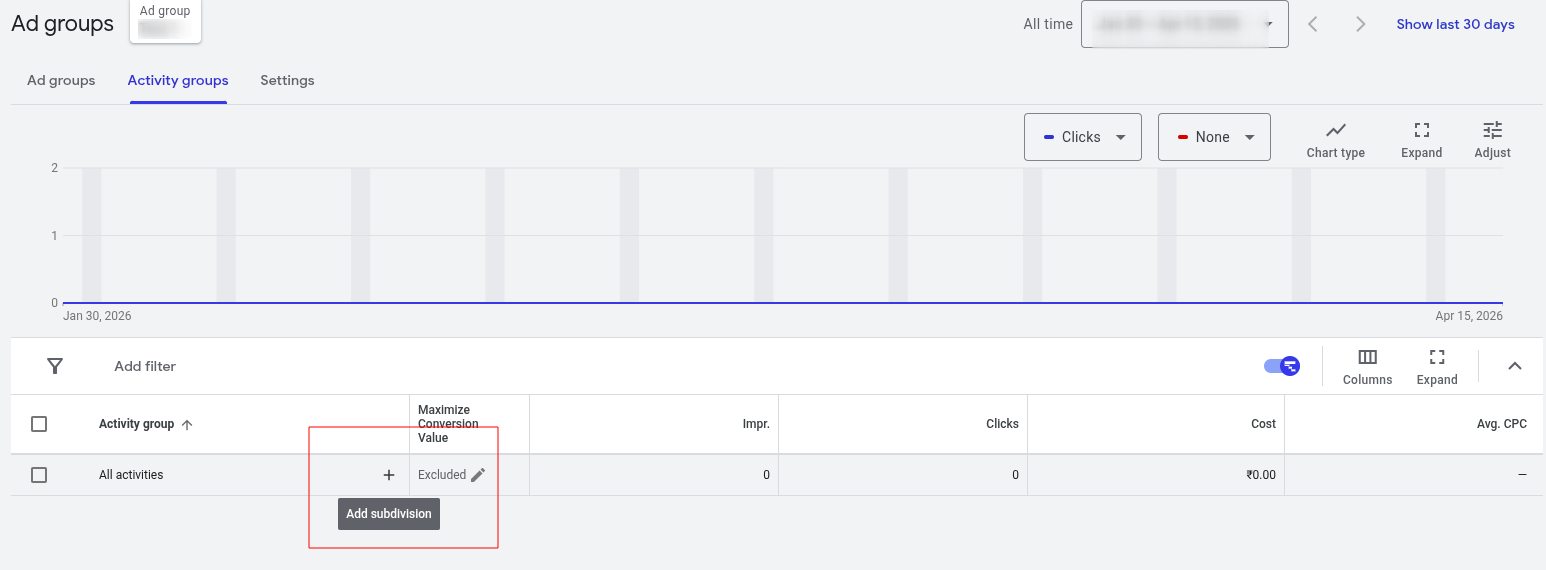
- Click the + next to All Activities to add subdivisions for targeting specific products. Select subdivide by Activity ID.
- Search and select the products/activities you want to target.
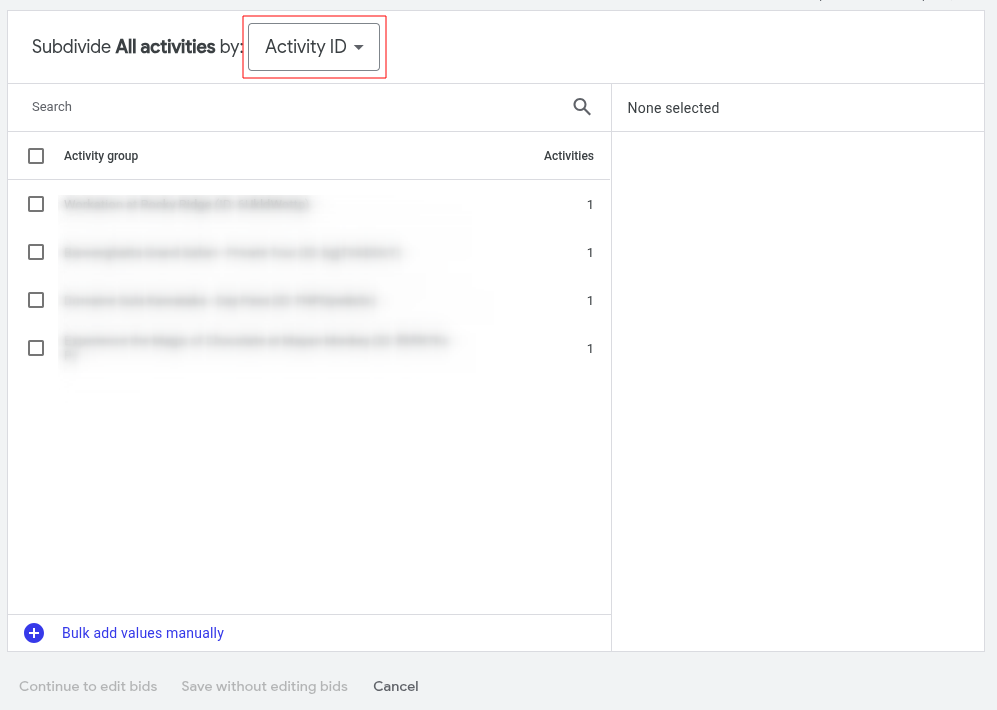
The list of activities may take a while to load. You may see products by other providers too in this list that are part of the Linking Account ID.
- Next activate bidding. Consider changing the status from Excluded to Automatic for maximum conversion & save your settings.
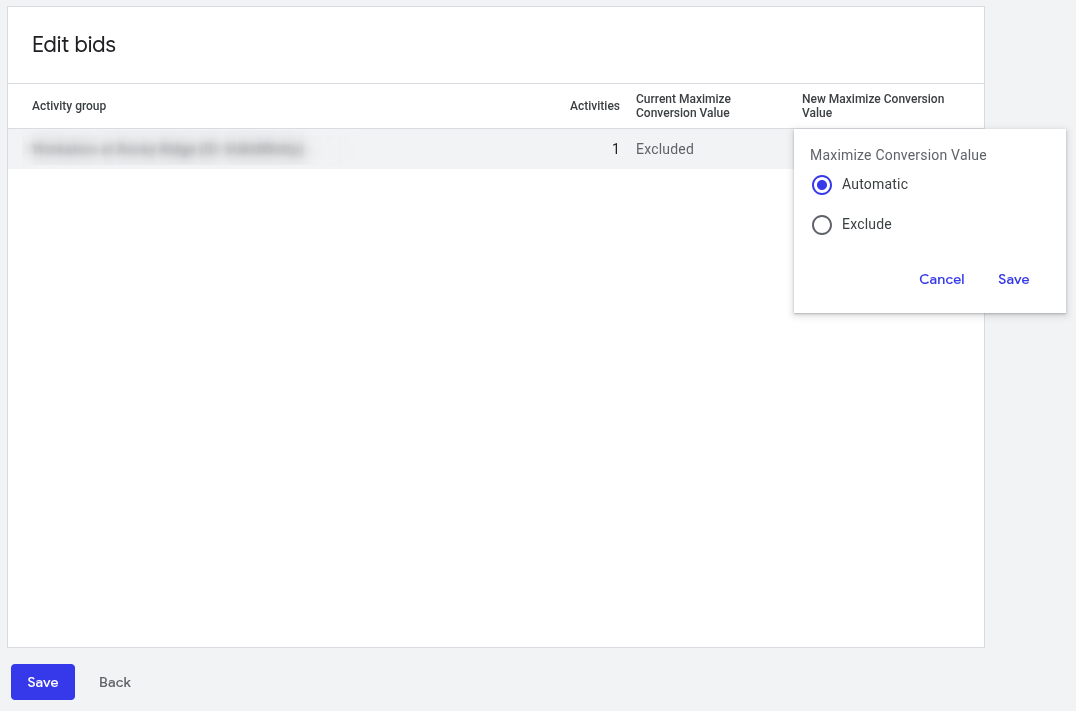
Your campaign is ready for business!
Important Considerations
- Bidding: Travel campaigns for Things to do typically require a Return on Ad Spend (ROAS) target.
- Data Sync: It may take up to 72 hours for the product data to fully populate in your Google Ads account after the initial link.
- Readiness: Ensure your products have a high GTTD Readiness Score in Spotinga before launching ads, as Google filters out incomplete listings from the auction.
Always use Tracking Links within Spotinga for your campaign landing page overrides to ensure your Affiliate and Channel reports accurately reflect your ad performance.